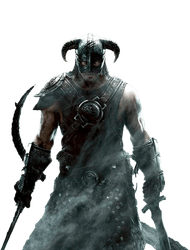
A searchable list of all 134 The Elder Scrolls V: Skyrim cheats for use with the latest version of the game on PC and Mac. Includes cheats from the Special Edition and Anniversary Edition of Skyrim.
Find below a searchable list of all Skyrim cheats, also known as commands, for The Elder Scrolls V: Skyrim on PC and Mac (Steam).
Some commands in Skyrim require a target - in our list, these are labelled with a Target Command badge. A target is an item, NPC or object in the game that a command applies its effect to. You can select a target by clicking on an item, NPC or object with your cursor whilst the console is open. Prefixing a command with player. will make your character the target of a command. For example player.RemoveAllItems would remove all of the items in your character's inventory, not your target's. See target help for more information.
Toggles god mode (invincibility) for your character.
TCL
Toggles noclip for your character (you will be able to walk through walls, objects, etc).
TDetect
Toggles AI being able to detect your character (NPCs won't react to you).
TAI
Toggles all non-combat AI (things like dialog will be disabled).
TCAI
Toggles all combat AI (NPCs won't be able to engage in combat).
ModAV carryweight
Sets your carry weight to the specified value.
player.AddShout
Unlocks the specified shout for your character.
PSB
Unlocks all shouts, spells and powers. This is very hard to undo; we recommend making a separate save beforehand.
CAQS
Instantly completes all quests (it's short for CompleteAllQuests). This is very hard to undo; we recommend making a separate save beforehand.
COC
Teleports you to the specified location.
COC qasmoke
Teleports you to a testing area that contains every item in the game.
SetRelationshipRank player
Sets the relationship rank between yourself and your selected target. To select a target, open the console and click on another NPC.
Change player to another NPC's reference ID to change the relationship rank between your target and that NPC.
player.AddItem
Adds the item with the specified ID and amount to your inventory.
player.RemoveItem
Removes the item with the specified ID from your inventory.
player.PlaceAtMe
Spawns the NPC with the specified ID next to you.
GetStage
Tells you the current stage you are at in the specified quest.
SetStage
Sets the stage you are at in the specified quest.
AdvSkill
Add the specified amount of experience to a skill.
SetScale
Multiplies the size of your target by the specified number. 0.5 is half as big, 2 is two times as big.
Use player.SetScale to change the scale of your character.
AddToFaction
Adds your target to the faction with the specified ID and sets their rank to the specified number. A rank of -1 will remove them from the faction. 0 is the lowest rank. The highest rank varies by faction.
To add yourself to a faction, use the command player.AddToFaction .
player.RemoveAllItems
Clears your inventory.
SetNPCWeight
Sets the weight of your target to the specified number. Click on an NPC with the console open to select them as your target.
Use player.SetNPCWeight to set your own character's weight.
SetCrimeGold
Add the specified amount to the bounty your target has with the specified faction.
Select a target by clicking on an NPC when the console is open. Use player.SetCrimeGold to add to your own bounty.
player.AddPerk
Adds the specified perk to your character.
kill
Kills your target. Click on an NPC with the console open to select a target.
player.SetLevel
Sets your level to the specified number.
SetOwnership player
Makes you the owner of your target.
Click on an object, NPC or other entity with the console open to select it as your target.
CompleteQuest
Completes the specified quest.
It is recommend you save before using this command as it is irreversible and can be buggy.
SexChange
Changes your character from male to female or female to male.
player.AddSpell
Unlocks the specified spell for your character.
player.RemoveSpell
Removes the specified spell from your character.
unlock
Unlocks the object (chest, container, door, etc) that you have selected as a target.
To select an object as your target, click on it whilst the console is open.
You can complete quests with the CompleteQuest command. Select a quest below and then copy the command.
Select a Quest
Select a quest to generate a command...
Set Relationship Rank
You can set your relationship with another NPC using the the SetRelationshipRank command. Select a rank below and then copy the command. The effect of this command will apply to the NPC that you're looking at.
Select a Relationship
Select a relationship to generate a command...
Spawn NPCs
In Skyrim, you can spawn an NPC - meaning a character, creature, enemy, boss, or any other living/moving thing - with the player.PlaceAtMe command. Select an NPC from the dropdown below to generate a spawn command. After, just copy the command and paste it into the Skyrim console to spawn that NPC!
Select a NPC ID
Select a npc id to generate a command...
Teleport Command (CenterOnCell)
In Skyrim, you can teleport to a location with the COC command (a.k.a CenterOnCell ). This cheat teleports to the "cell" (part of the map) with the specified ID.
Select the location you'd like to teleport to from the dropdown below, then hit the copy button to copy the teleport command to your clipboard. Paste that command into the Skyrim console to teleport to your desired location!
This command adds the item with the specified item ID to your selected target's inventory. To add an item to your own inventory, use the command 'player.additem'. You can specify a negative amount to remove items from an inventory (e.g. -1 would remove 1 of the specified item).
This console command will set your target's health to 0, killing them. Essential characters cannot be killed. To kill your own character, use 'player.kill'
This command will lock any chest, door or other lockable thing that you have selected as your target. Lock levels above 100 cannot be unlocked without a key. See argument information for details regarding lock levels.
If you do not have a target selected, this console command enables and disables (toggles) all non-combat AI. When non-combat AI is disabled, NPCs (characters, monsters, etc) have all non-combat functions (like dialogue) disabled. If you have selected a target, this command will toggle non-combat AI for the selected NPC only.
This command clears all spell and poison effects from the target you currently have selected. Use 'player.dispelallspells' to dispel all spells from your own character.
This command copies the inventory of the target you currently have selected into the inventory of the NPC/container with the specified reference ID. To get the reference ID of an NPC, click it whilst the console is open and its reference ID will appear in brackets above the console.
This command equips the item with the specified ID to your target, provided they have the item in their inventory already. See argument information for customization options. Use 'player.equipitem' to apply the effects of this command to your character. For item codes, see item ids.
This command makes your currently selected target equip the spell, shout, potion effect or power with the specified ID. To make your character equip a spell, use the command 'player.equipspell'.
Target Command
equipspell< Spell ID > < Left / Right / Voice / Instant >
This command equips the shout with the specified ID to the NPC you currently have selected as a target. Use 'player.equipshout' to equip a shout to your character with this command.
This command will allow you to take control of the NPC you currently have selected as a target. This means you will be able to use WASD, etc to move the NPC. After toggling control of another NPC, your movements, etc will be shared between both your character (Dragonborn) and the controlled NPC (so pressing W would move both forward) - to toggle control of your own character, use the command 'player.tc'.
This command will disable combat AI for all NPCs in the game. When combat AI is disabled, NPCs are unable to engage in anything combat-related (so they won't be able to attack you). It is not possible to toggle combat for a specific NPC.
This command toggles 'noclip' mode. In noclip mode your character has collision disabled and will be able to fly through walls, floors, and any other solid object that would usually not allow for this. This command will not work if you have a target selected - you must deselect your current target in order for this command to work.
This command will enable and disable (toggle) AI detection. With AI detection enabled, NPCs are aware of you when you are nearby and/or performing actions like combat on them. With AI detection disabled, NPCs will won't be aware of your proximity to them - so for instance, aggressive monsters that would usually attack you when nearby will no longer attack you. Note that this command does not stop detection for pickpocketing.
This command will toggle (enable and disable) End-of-Frame ImageSpace graphics settings including blur and contrast adjustment. These graphics settings can cause lower frame rates, because of this, this command usually raises FPS. The changes made the graphics settings are not saved - you will need to re-execute this command when you close and re-open the game.
This command will make you control the camera instead of your character, making you act as a 'flying camera'. If you specify a '1' (without quotes) at the end of the command, the game will pause, but you will still be able to move the camera around.
This command toggles the visibility of undiscovered regions on the local map which are usually covered by 'Fog of War'. Only the local map is affected by this command - the world map, etc are left unchanged.
This command enables and disables (toggles) 'god mode'. In god mode, most stats including health, stamina and Magicka are infinite and will not drain. Your character's speed will no longer be affected by the amount of weight he/she is carrying.
This command enables and disables (toggles) 'immortal mode'. When in immortal mode, your character will not be able to die (health will not reach 0). Unlike god mode, when in immortal mode your stats like stamina and Magicka are still drained/affected as they would normally be.
This command hides the entire GUI including all menus, health bars, etc. Note that this command will also hide the console - if you press your console hot key, type 'tm' and hit enter again (even though you cannot see the console), the GUI will be enabled again.
This command enables and disables (toggles) the rendering of trees. With this toggled on, trees will not be loaded/visible. This setting can result in an FPS boost.
This command switches (toggles) the rendering mode to wireframe. When in wireframe mode all objects, including buildings will have their wireframes rendered instead of their textures.
This command will add the specified amount to a specified actor value of your currently selected target. An actor value is a value given to character traits to change their characteristics - e.g. 'Aggression' controls the aggression level on an NPC. See actor value IDs here. This command will not make an actor value go lower than is 'organically possible' - a Whiterun Guard's maximum health level is 252, so you could only restore health for a Whiterun Guard up to 252. Use 'player.restoreav' to change your own values.
This command will remove a specified amount from an actor value of your currently selected target. An actor value is a value given to character traits to change their characteristics - e.g. 'Health' controls amount of hitpoints an NPC has. See actor value IDs here. Use 'player.damageav' to change your own values.
This command will hide your current selected target (make it invisible). NOTE: this command will hide a target from view and disable both collision and AI however, the target is still 'present' and things such as scripting for the NPC/target will still take place.
This console command forcefully sets an actor value to the specified value. Note that this command can stop actor values from functioning correctly (e.g. health may not naturally restore for the target) - it is recommended that you use the RestoreActorValue and DamageActorValue commands to avoid problems.
This command is similar to the 'getav' command but instead returns more information including max value, base value and modifiers. Use 'player.getavinfo' to get verbose information for your character's actor values.
This command will check if a location, specified by its location ID, has been cleared or not. 0 will be printed to console if the location has not been cleared, 1 if it has.
This console command will show the relationship level (friendliness) of two characters (the NPC you currently have selected as a target and the NPC with the specified reference ID) (see examples for help). A relationship rank is a number between -4 and 4 - a higher number means the two characters have a stronger relationship.
This command will print to console the perk rank of the specified perk for your target. If the target does not have the perk, the perk rank will be 0. Use 'player.hasperk' to check your own perk rank. For perk IDs, see our perk ID list.
This command permanently deletes your targeted object, NPC or item from the game. Note that this is note the same as the disable command, as the disable command only makes the target invisible - this command removes the target from memory.
This command will add the specified amount to the actor value with the specified ID from your targeted NPC or object. Use 'player.modav' to change your character's actor values. Specify negative amounts to decrease actor values.
This command makes your target perform the animation with the specified ID. You can attempt to use 'player.playidle' to make your character perform an animation however most animations do not work with the player character.
This command pushes the actor with the specified reference ID away from your target (by the specified distance). The target is not the actor that is moved - the actor with the specified reference ID is pushed away from the target.
This command has a different effect based on your target. If your target is an NPC, it will revive the NPC, restore the NPC's weapon, but not its entire inventory. If your target is a container, it will set the contents back to their default (i.e. what the container had when it first spawned, meaning if it was empty, it will emptied). If your target is an object, the object will be moved back to the position in the world it spawned at. If you use the command 'player.recycleactor', this command will not kill you or reset your inventory, instead it will add iron armor, iron weapons and some other useful gear - useful if you're starting out and want a boost.
This cheat will clear all items from the inventory of your target. This command can be used on NPCs and containers. Use 'player.removeallitems' to clear your own inventory. Use 'removeallitems player' to move items from your target's inventory into your character's.
Not to be confused with 'removeallitems', which clears an inventory. This console command will reset an NPC or container's inventory back to the way it was when it first spawned.
This command will print the console the current coordinate of the target along the specified axis. Use 'player.getpos' get the position of your own character.
This command sets the coordinate of your target for specified axis (the location/position along the axis). Use 'player.setpos' to change your character's position.
This command sets the specified actor value to the specified value. It is recommended the DamageActorValue and RestoreActorValue commands are used instead of this command, as this command can cause things to not function correctly.
This command can be used to change the essential status of an NPC (a specified base ID, not your target or a reference ID). An essential NPC is (by default) an NPC that is 'essential' to the game - e.g. an NPC necessary for a quest. Essential NPCs are 'immortal', they cannot be killed (as they're required for the game). An example of a non-essential NPC is a Whiterun Gaurd, there are many of them and no single Whiterun Guard is 'essential' to complete the game.
This cheat will make a targeted NPC complete 'favors' for you. After setting favor state to 1 for an NPC, follow the instructions on the screen. Pressing 'E' on the ground will make the NPC wait at that location, pressing 'E' on a door will make the NPC open that door for you, etc. Pressing the TAB key will set the favor state of NPC you are current controlling to 0 again.
This command can be used to change the level of a target, relative to your character. The level of the NPC will update as you level up. See argument information and examples for more help.
This command sets the location with the specified ID (location ID, not reference ID) either as cleared or uncleared. When a location is cleared, it will show up on the map and the game will think that you have discovered, or have 'cleared', the location before.
This command sets the weight of your current target (NPC or player) to the specified value. The NPC's model will be updated to correspond with the weight change. Use 'player.setnpcweight' to change your own character's weight.
This console command sets ownership of the item you have selected as a target to the specified NPC or faction with the specified base ID (see argument information and examples for help). To select an item as a target, drop it on the ground and click on it whilst the console is open. If your target is a container, all of the items inside the container will have their ownership changed.
This cheat will change the sex of your target (if they're male, this command will make them female and vice versa). Use 'player.sexchange' to change the sex of your character.
This console command unequips the item with the specified base ID from your target. Use the 'left' and 'right' arguments if the item is held in either hand. The command 'player.unequipitem' can be used to unequip items from your own character.
As with the CompleteAllQuestStages command - this command may cause bugs, so it is recommended that you first save your game. This console command completes the quest with the specified ID.
This command teleports your character to the target of the quest with the specified ID. The 'target' is the location that the marker on the map is highlighting (where you need to be to advance). This is useful for saving time travelling to specific locations, without skipping through the actual quest content.
This console command resets your stage in the quest with the specified ID. In other words, this console command puts you at the first stage of the quest so that you can start again.
This command unlocks (adds to your target's spell list) the shout with the specified ID. Use 'player.addshout' to add a shout to your own spell list. Make sure you have the spell the shout is a part of also unlocked, otherwise it won't work.
This command unlocks (adds to your target's spell list) the spell with the specified ID. Use 'player.addspell' to add a spell to your own character's spell list.
This command advances your character by one level. Although the level of enemies will respond to this change (they will be higher leveled), none of your skills increase, you do not receive any perk points and also attributes are not advanced.
This command will add the specified amount of experience points to the skill with the specified ID for your character. Note that the amount experience required to level up each skill differs - make sure that you do not add too much.
This command enables Skyrim's 'animator camera'. The animator camera allows you to change the position of the camera (rotate, zoom, move). Whilst in animator camera mode, the camera will stop following the player.
This command executed without arguments can be used to fix bugs/glitches with your game controls. See argument information and help for advanced usage.
enableplayercontrols< Movement > < Combat > < First Person > < Looking > < Sneaking > < Menu > < Activate > < Journal Tabs > < Perspective Type >
This console command pays off a bounty, with optional parameters to specify whether or not to remove the items you stole and whether or not to send you to prison. This command will by default pay off a bounty for the faction of the NPC you currently have targeted. If you specify a faction ID, the bounty belonging to that faction will be paid off instead. Use 'player.paycrimegold' to pay off your own bounties.
This command removes the specified amount of the specified item from your target's inventory. To remove an item from your character's inventory, use the command 'player.removeitem'. Note that this command permanently deletes the removed item(s), use the 'drop' command to drop an item from an inventory to the ground.
This command removes the spell (or power, shout, disease, etc) with the specified ID from your current target. Use 'player.removespell' to remove a spell from your own character.
Provided you are already in 3rd person mode, this command will toggle the visibility of the first person arms that usually appear on the screen in first person. This means when you, for example, punch, both your third person model and the hands (first person) would punch.
This command adds (despite the name, it doesn't not set) the specified amount to your target's bounty with the specified faction. Use 'player.setcrimegold' to add to your character's bounties.
If executed without any arguments (just 'SetPlayerRace'), the race menu will be opened, allowing you to customize your character's race. Otherwise, this command will change the race of your character to the race with the specified ID.
This command lists all of the items in the inventory of your current target. Use 'player.showinventory' to list all of the items in the inventory of your character.
This command will tell you if your target is within the cell with the specified ID. If your target is within the cell, 1 (true) will be printed to console, otherwise 0 (false) will be printed to console. Use 'player.GetInCell' to see if your character is in a cell. Use 'PickRefById reference ID' to select a target that's out of view.
This command prints to console the value of the specified miscellaneous statistic. Miscellaneous statistics are the figures should in the escape menu (e.g. total barters).
This command, if executed without any arguments, will print a list of console commands to the console. If executed with an argument (e.g. help "arrow"), this command will print to the console a list of all commands, item IDs and base IDs containing the argument.
This command "purges" the cell buffers - this essentially means the "cells" (parts of the map) that are no longer being used but are still stored in the game's memory (buffer) are removed and deleted (purged).
This command sets the item, object or NPC with the specified reference ID as your target. This is especially useful if you know the reference ID of your target but are unable to click on them (e.g. they are outside of your view or invisible).
This command saves the game to the specified save file. If your entered save file name has spaces in, you will need to surround it in quotation marks (e.g. "Example Save").
This command can speed up or slow down the speed the game runs at. A multiplier of 2 would make the game run at two times its usual speed (movement, animations, etc are all affected). A multiplier of 0.5 would make the game run at half its usual speed (everything would be in slow motion).
Skyrim (Elder Scrolls V) is a massive, immersive game - there is a lot to explore.. including the command console! Skyrim has over 125 commands for you to use to tweak and improve your gameplay. This guide teaches you the following (click to jump to that part of the artcle):
In Skyrim, the console is only available to players on PC and Mac (Steam). It is opened by pressing a hotkey, so provided you haven't changed your console hotkey settings, pressing one of the following keys should open up the console in-game:
Pressing ` (grave, located above ESC)
Pressing ~ (tilde)
If the above keys aren't working for you, you should try navigating to your keyboard settings and look to see which key the "Console" hotkey has been set to. You can also try the following common hotkeys (for other keyboard layouts):
|
^
\
§
How to Use the Console
Commands are simply pieces of text that tell the game what to do. The player.ResetHealth command, incase you hadn't already guessed, would set your character's health back to its maximum level.
To execute commands, type them into the text box at the bottom of the console and hit the ENTER key. If that's all you needed to know, you might want to head over to our console commands list. If you still want to learn, there's a lot more information below!
How to Scroll Up and Down
In Skyrim's console, you are unfortunately unable to scroll up and down using your mouse. You must use the PAGE UP and PAGE DOWN keys on your keyboard. These are usually located above your arrow keys.
What is a Target?
A target could be an object, NPC, item - anything in the game! In Skyrim, commands are often applied to a "target". A good example of a targeted command is the reset health command: this command will reset the health of your target.
To select a target in Skyrim, all you have to do is click on your desired target whilst the console is open. Let's say you wanted to kill a guard, all you'd have to do is open up the console, click on the guard with your cursor, and then type the command kill into the console.
To unselect a target, all you need to do is click the target with your cursor whilst the console is open again. If a target is selected, its reference ID will appear in brackets above the console - you can verify whether or not you've successfully unselected your target by checking to see if this is still visible.
You can target your character with a command by typing player. before the command. If you wanted to kill your character instead of a guard, you would type player.kill .
What is a Reference ID?
A reference ID is a unique ID that is assigned to every item, object and NPC in the game - and by every, we mean every. Whilst two Whiterun Guard's may have the same NPC ID, each individual guard will have their own reference ID. If you spawn two items, each item would have its own reference ID. Two of the exact same haybales may be in a barn, but each haybale has its own reference ID. You get the idea.
Make sure you don't confuse reference IDs with base IDs (they're explained below). Base IDs are IDs assigned to a type of item, object, or NPC - two of the same object would have the same base ID, but each a different reference ID.
Finding out the reference ID of an item, object or NPC is fairly easy. All you have to do is open the console, click what you want to find the reference ID of, and its reference ID will appear above the console in brackets. Let's say it's a Whiterun Guard - if you click that guard (with your cursor), its reference ID would appear like so:
What is a Base ID?
A base ID is a short, unique code assigned to a type of item, NPC or object - it is not the same as a reference ID. Every Bear Pelt item in the game has a base ID of 0003AD52, Bear Claws a base ID of 0006BC02, Dear Pelt a base ID of 000CF89E, you get the idea.
Base IDs are used in commands where a new instance of an item, NPC or object is created - for example, the AddItem command the base ID of the item you wish to spawn. You can find out base IDs using the Help command, or by using one of our pre-compiled, searchable lists:
On our Skyrim cheats list, you will find the word "argument" being used a lot. An argument (when used in the context of console commands) is another word, or piece of data, that you add to a command. Arguments are separated by spaces in Skyrim. For example, in the command player.AddItem 000E94D4 1 , the arguments are 000E94D4 and 1 .
Arguments aren't always necessary, sometimes they're optional. For example in the RemoveAllItems command, you can optionally specify a reference ID as an argument - if you do, the removed items would be put in the inventory of the NPC or container with the specified reference ID. If you don't specify an argument in the RemoveAllItems command, the items will be permanently deleted.
That's all there is to this article. If you want to learn more about the Skyrim console, check out the guides on our blog. If you want to jump into the action and find commands to use, check out our command list.
God Mode & Invincibility Cheats
Damage is inevitable in Skyrim, that is, if you don't have god mode. God mode provides you with unlimited health, stamina, magicka, carry weight, amongst many other benefits. It can be enabled using console commands. This guide shows you how.
In order use console commands, you'll need to know how to open and use the console (PC / Mac users only). The hotkeys to open the console are ` or ~ - either should work fine. If you need more help opening or using the console, check out our console guide.
There are two commands that can be used to enter god mode in Skyrim:
ToggleGodMode
The above command (ToggleGodMode) will put your character in god mode and also remove carry weight limitations and stop stamina, magicka, etc from draining. This is a toggle command, so to turn god mode off, just run the command again.
ToggleImmortalMode
The above cheat (ToggleImmortalMode) will put your character in "Immortal Mode" which, like the ToggleGodMode command, will make in invincible, stopping your character from dying and taking damage. Unlike the ToggleGodMode command, your stamina and magicka will still drain, and you'll also still have carry weight limitations.
That's all there is to becoming invincible in Skyrim. For more commands, check out our cheats list. If you fancy a bit of reading, you can find more command articles like this one on our blog.
Skyrim Stop Combat Command
It can be very annoying when other NPCs try to attack you in Skyrim. Thankfully, there's a console command that can stop this from happening, even if they're attacking you because you started to attack them!
First, open the console with the ` or ~ keys. If these don't work, check out our console guide above before proceeding.
Then, run the following command:
player.StopCombatAlarmOnActor
After running this command, all NPCs engaged in combat with you will forget you ever existed... that is, until you attack them again!